 Save
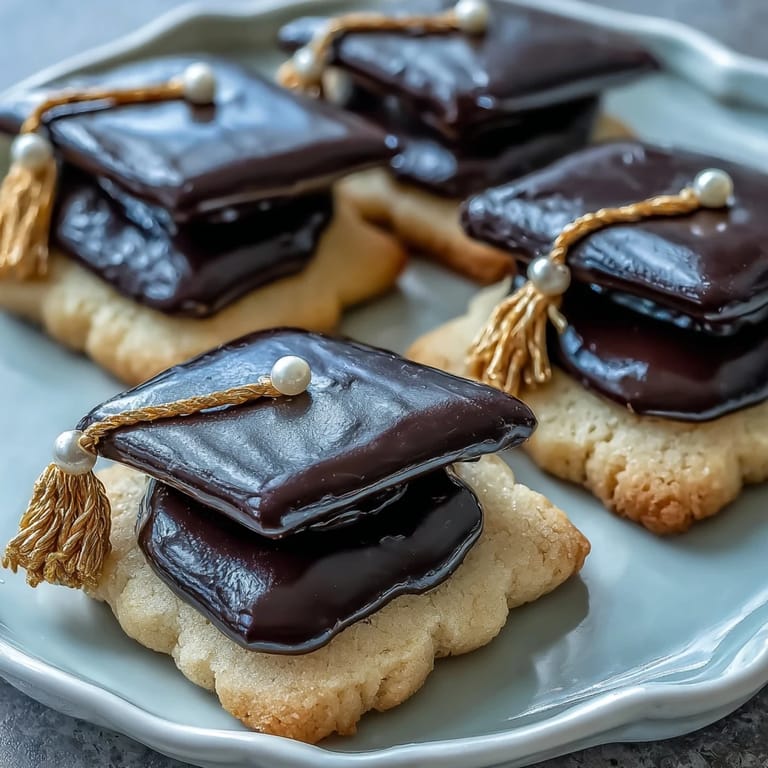
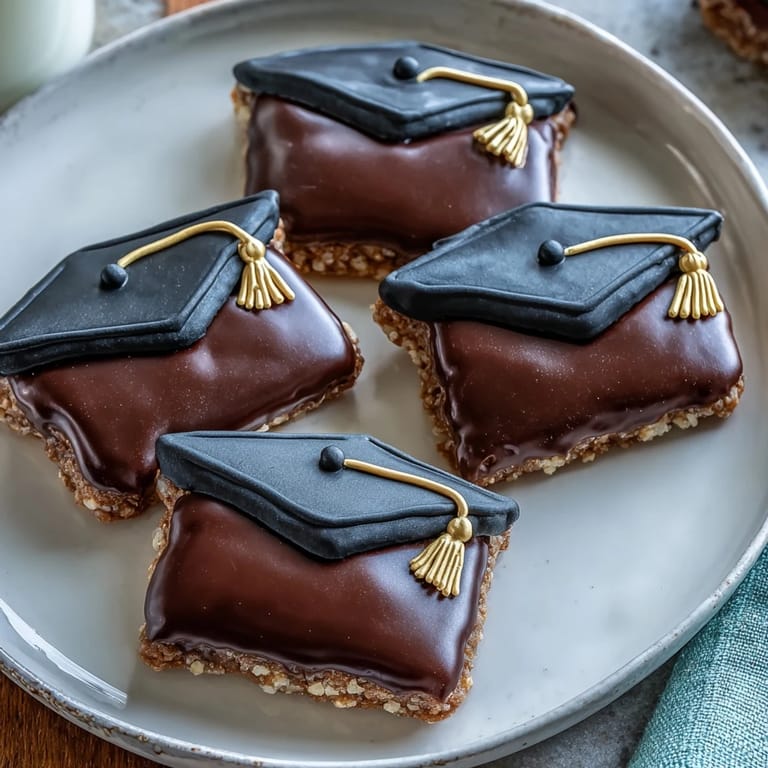
Save My cousin texted me a photo of her cap and gown the night before graduation, and I found myself in the kitchen at midnight, flour dusting my apron, determined to bake something that captured that exact moment of pride. These graduation cap cookies emerged from that spontaneous energy, their black icing reflecting the solemnity of the ceremony while the tiny yellow tassels caught the light like little celebrations frozen in sugar. What started as a sleep-deprived idea became the one thing guests actually remembered eating at the party the next afternoon.
I made these for a graduation party where the guest of honor was switching careers in her forties, which meant something entirely different to everyone in that room. Watching grown adults lean in to admire the detail on a cookie felt ridiculous and then somehow deeply sweet, like we were all in on a small, edible joke about how big moments deserve to be honored, even if we do it with candy and royal icing.
Ingredients
- All-purpose flour (2 1/2 cups): This is your foundation, and measuring by weight keeps the dough from becoming tough or dry, something I learned after years of using the scoop-and-level method.
- Unsalted butter (3/4 cup, softened): Soft butter beats in air and creates that tender crumb; take it out of the fridge thirty minutes before you start so it yields to gentle pressure from your finger.
- Granulated sugar (1 cup): The white sugar gives you the crisp edges that make these cookies feel special rather than cakey.
- Large egg and vanilla extract (2 teaspoons): These bind the dough and add warmth without competing with the flavor of good butter.
- Baking powder (1/2 teaspoon) and salt (1/4 teaspoon): Baking powder provides just enough lift to keep cookies tender, while salt amplifies every other flavor.
- Powdered sugar (3 cups, sifted): Sifting removes lumps and ensures your royal icing stays smooth and pipeable instead of grainy.
- Egg whites or meringue powder: If you're nervous about raw eggs, meringue powder mixed with water works beautifully and sets up just as glossy.
- Black and yellow gel food coloring: Gel colors are concentrated so they don't thin your icing the way liquid colors do, and they produce colors that actually look like a graduation cap.
- Mini M&Ms or candy pearls: These become the tassels, and the yellow ones catch light in the most satisfying way.
Tired of Takeout? 🥡
Get 10 meals you can make faster than delivery arrives. Seriously.
One email. No spam. Unsubscribe anytime.
Instructions
- Whisk your dry ingredients together:
- In a medium bowl, combine flour, baking powder, and salt with a fork or whisk, breaking up any flour clumps you find. This distributes the leavening evenly so every cookie rises the same way.
- Cream butter and sugar until fluffy:
- Beat them together for two to three minutes until the mixture goes pale and lighter in texture, which means air is being incorporated. You'll hear the mixer sound slightly different when it's ready.
- Add egg and vanilla, then combine:
- Mix these in until the batter looks uniform again, scraping down the sides of the bowl so nothing stays clumped at the bottom.
- Fold in the flour mixture gently:
- Add it in three additions, mixing just until streaks disappear before you add the next portion. Overmixing here is the thing that makes cookies tough, so stop as soon as you can't see flour anymore.
- Chill the dough:
- Split the dough between two disks, wrap them individually, and refrigerate for at least thirty minutes or up to overnight. Cold dough rolls thinner without sticking and bakes into crispier edges.
- Roll and cut:
- On a lightly floured surface, roll dough to quarter-inch thickness and use a graduation cap or square cutter, dipping it in flour between cuts so it doesn't drag. The thickness matters more than perfection here.
- Bake until golden at the edges:
- Place cookies on parchment paper and bake at 350 degrees for eight to ten minutes, watching for the moment when edges turn pale golden but centers still look slightly soft. They firm up completely as they cool.
- Make the royal icing:
- Beat egg whites or meringue powder with water until foamy, then gradually add sifted powdered sugar while beating, continuing until you have stiff peaks that hold their shape. This takes about five minutes and your arm will know when it's done.
- Divide and tint the icing:
- Set aside a small amount of white icing for details, then tint the rest black and a portion yellow using gel coloring. Adjust consistency by adding water for flooding or more powdered sugar for piping.
- Outline and flood each cookie:
- Pipe a thin black outline around the edge of each cookie shape, then fill the inside with slightly thinner icing, using a toothpick to guide it into corners. Let this set for thirty minutes to an hour before adding details.
- Add the yellow tassel and button:
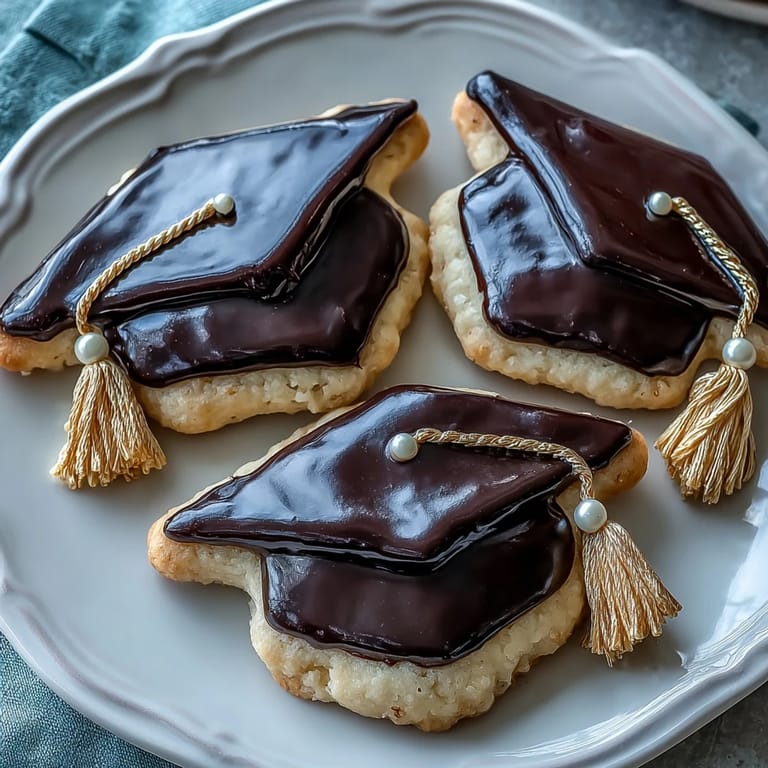
- Once black is set, pipe a small yellow square or circle at the top center of each cap for the button, then a thin line down for the tassel. Top with a mini M&M or candy pearl at the bottom of the tassel line.
- Let cookies dry completely:
- Wait several hours or overnight before serving or packaging so the icing hardens fully and doesn't smudge or transfer between cookies.
 Save
Save The real gift of these cookies isn't their appearance, beautiful as it is, but the excuse they give you to sit with someone on their biggest day and say, without words, that you think this moment is worth celebrating. I've made them a dozen times since that midnight panic, and each time feels like a small ritual of honoring someone's next chapter.
Timing Your Bake
You can bake the cookies up to two days ahead and store them in an airtight container, which takes the pressure off if you're juggling a lot before the celebration. Decorating is best done the day of serving or the night before, when you have time to let the icing set without rushing, and honestly, there's something meditative about piping these while thinking about the person you're celebrating.
Customizing Your Caps
If graduation black feels too formal for your crowd, these work beautifully in school colors, team colors, or even pastels for other celebrations. The cookie base is neutral enough to pair with any color story you want to tell, and the shape is flexible too—cut them as squares if you don't have a cap cutter, or even as simple rectangles.
Royal Icing Secrets and Storage
Fresh royal icing tastes ethereal and sets with a slight sheen that reminds you it was made by your own hands, though store-bought works perfectly if you're short on time or nervous about raw eggs. These cookies keep beautifully in a sealed container for up to a week, and the icing actually firms up over time, making them even more transportable to parties or celebrations.
- Make your icing thinner than you think you need for flooding—it spreads more naturally and fills small spaces without you having to wrestle it.
- If the icing seems too thick after a few minutes of piping, add water one teaspoon at a time rather than all at once.
- Keep a damp kitchen towel nearby to wipe your piping tip between colors so yellow doesn't muddy your black or vice versa.
 Save
Save These cookies are proof that small, thoughtful things add up to something that tastes like pride and celebration. Bake them with someone's achievement in mind, and watch how a simple cookie becomes a memory.
Recipe FAQs
- → How do I achieve smooth royal icing for decorating?
Beat egg whites or meringue powder with powdered sugar until stiff, glossy peaks form. Adjust consistency by adding water for flooding and more sugar for piping fine details.
- → Can I prepare the cookies in advance?
Yes, cookies can be baked up to two days ahead and decorated the next day for best results, allowing icing to set properly.
- → What can I use instead of gel food coloring?
Natural color alternatives like beet juice for red or turmeric for yellow can be used, though colors may be less vibrant.
- → How thick should I roll the dough?
Roll the dough to about 1/4-inch (6 mm) thickness to ensure even baking and sturdy cookies for decorating.
- → What are good tools for intricate icing designs?
Use small piping bags with fine round tips and toothpicks to outline, flood, and shape fine details on the cookies.