 Save
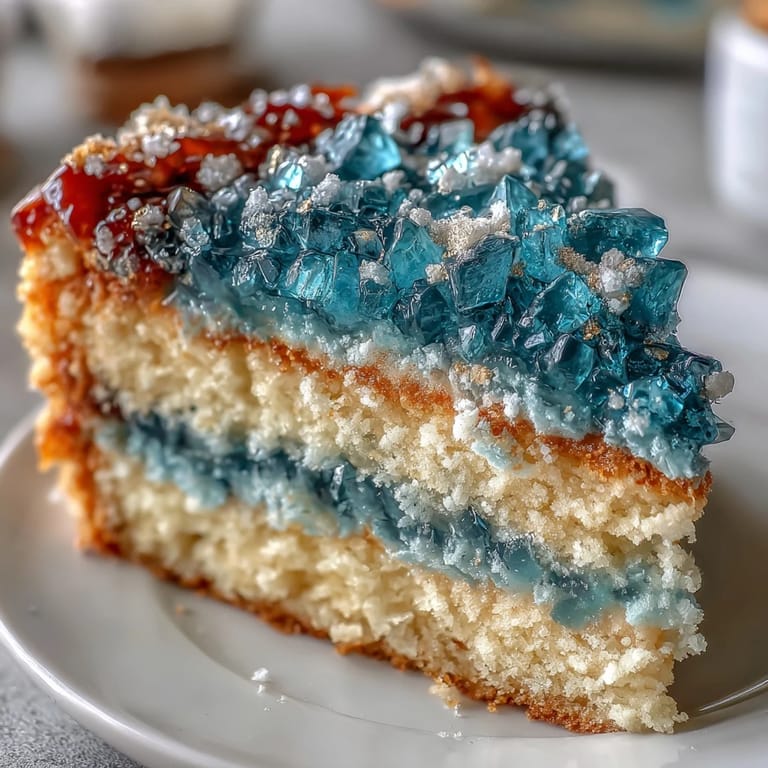
Save The afternoon I decided to bake a graduation cake was noisy, flour dust swirling around as music played and I worked out how to make the geode slice shine. It felt oddly satisfying to channel my nervous energy into creaming butter and sugar, knowing the teal and gold would surprise everyone at the party. I always loved the thrill of transforming simple ingredients into something bold and dramatic, especially for a milestone celebration. The smell of vanilla drifted through the kitchen, while my hands grew shaky with anticipation for the reveal. There's something about sculpting crystals and painting gold edges that turns your kitchen into a tiny art studio.
One rainy spring day, my sister helped me layer the cake and kept sneaking spoonfuls of buttercream while we debated whether the gold accents looked better brushed or leafed. We laughed about how our first crystal placement looked more like a mini avalanche than a geode, but once we smoothed the teal around the edges, the whole cake glowed in the kitchen light. That afternoon became less about perfection and more about creating something unique together, hands sticky and spirits high.
Ingredients
- All-purpose flour: Gives the cake structure, and sifting it prevents lumps—I always tap the bowl for good measure.
- Baking powder: Ensures a tall, fluffy cake; I double-check the expiration date for maximum lift.
- Salt: Balances sweet flavors, making every bite sing.
- Unsalted butter: Room temperature helps it cream smoothly; the foundation for both cake and buttercream.
- Granulated sugar: Sweetens and aerates the cake—creaming long enough is key.
- Large eggs: Bind and enrich the batter; crack each one into a separate bowl to avoid shells.
- Vanilla extract: Adds warm aroma and flavor that fills the entire kitchen.
- Whole milk: Moistens the cake; pouring slowly prevents splashes and ensures even mixing.
- Powdered sugar: Sifted for lump-free, silky buttercream; patience pays off here.
- Heavy cream: Adjusts buttercream texture; adding a tablespoon at a time saves over-thinning.
- Teal gel food coloring: Vibrant color; use sparingly and mix well for depth.
- Rock sugar crystals: Mimic natural geode formations—pick the biggest ones for drama.
- Edible gold leaf or luster dust: For an ultra-luxe finish; small touches elevate the design.
- Simple syrup (optional): Keeps cake layers extra moist, especially if prepping ahead.
Tired of Takeout? 🥡
Get 10 meals you can make faster than delivery arrives. Seriously.
One email. No spam. Unsubscribe anytime.
Instructions
- Bake the Vanilla Cake:
- Preheat your oven while the ingredients come to room temperature—it's the secret to fluffy layers. Whisk flour, baking powder, and salt together, then cream butter and sugar until it's pale and airy, listening for the soft sound of the mixer.
- Mix & Layer the Batter:
- Add eggs one at a time, scraping the bowl and blending after each; pour in vanilla for that distinct aroma. Alternate dry ingredients and milk, folding gently so the batter stays light before dividing evenly among pans.
- Bake & Cool:
- Bake until the tops spring back and a toothpick comes out clean—don't overbake or the edges will get tough. Let the cakes cool in their pans for 10 minutes, then transfer to racks to finish cooling.
- Make Buttercream:
- Beat butter until creamy, gradually adding powdered sugar to avoid clouds of dust. Mix in vanilla and cream, checking the texture as you tint most of it teal, leaving a portion uncolored for crumb coating.
- Color the Sugar Crystals:
- Place rock sugar in a bowl and gently fold in teal gel coloring, aiming for an even shade. Let them dry on parchment—they'll be easier to handle when assembling the cake.
- Assemble Layers:
- Level cakes for a sharp finish, brushing with simple syrup if you like. Stack layers with buttercream, crumb-coat, and chill for a smooth surface before frosting with teal buttercream.
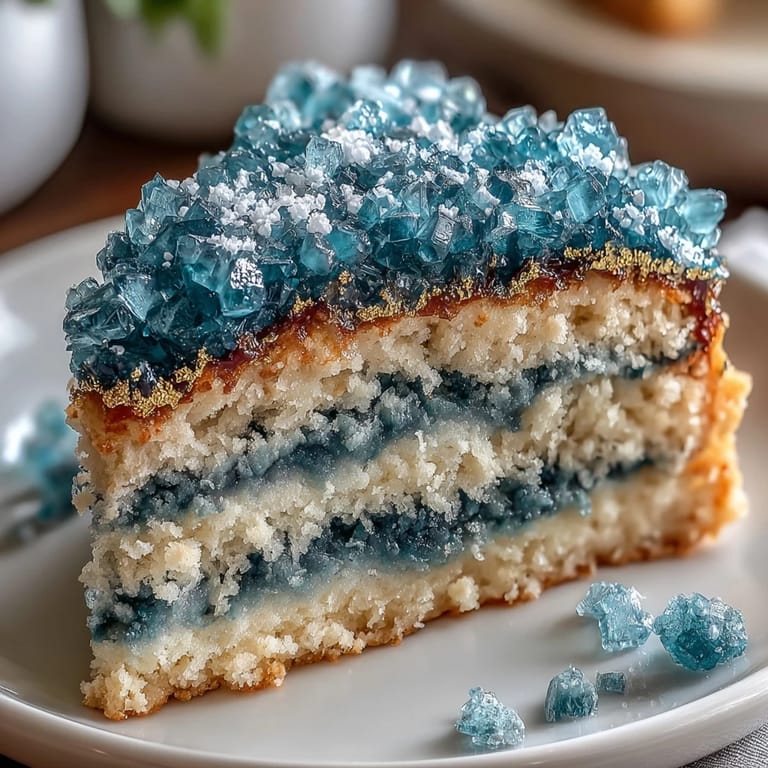
- Shape the Geode Slice:
- Carve a slice using a serrated knife, exposing the layers inside; apply buttercream to act as glue for crystals. Arrange colored crystals from light in the center to dark on the edge, pressing them gently to create depth before painting the border gold.
- Add Final Touches:
- Brush gold accents across the cake and place a graduation topper if desired. Step back and admire your creation—the design truly comes alive under the lights.
 Save
Save When my cousin saw her name in gold on the cake, she grinned so wide it felt like the cake was a gift in itself. Watching everyone marvel at the shimmering slice made weeks of recipe testing feel utterly worthwhile—it was the centerpiece of the whole celebration.
Getting Those Sugar Crystals Just Right
I learned that mixing gel coloring into sugar crystals is delicate—too much liquid makes them clumpy, but just a few drops and gentle stirring gives you vibrant shards. Letting them dry on paper prevents sticky fingers and keeps the finished geode looking clean and glassy.
Buttercream That’s Smooth Every Time
The trick is to beat the butter long enough that it loses its yellow tint and turns pale, then add powdered sugar gradually while the mixer runs slowly. If the buttercream is too stiff, add cream in tiny increments; a soft and spreadable frosting makes decorating far less stressful.
Gold Accents and Assembly Ideas
Using a small, food-safe paintbrush makes painting gold onto the geode slice much easier, especially for those dramatic edges. Set aside the cake for a few minutes before adding the topper to prevent fingerprints and smudges.
- Try mixing gold luster dust with a splash of vodka for a sharper metallic effect.
- Keep a damp towel nearby for wiping sticky hands between steps.
- Always triple-check the cake's stability before moving it to the table.
 Save
Save Cakes like these turn ordinary parties into memorable events, and each geode slice feels like a little treasure. Sharing it with friends and family is far more rewarding than any bakery box.
Recipe FAQs
- → What gives the geode design its realistic appearance?
Teal-tinted rock sugar crystals and edible gold highlights create depth and shimmer for authentic geode effect.
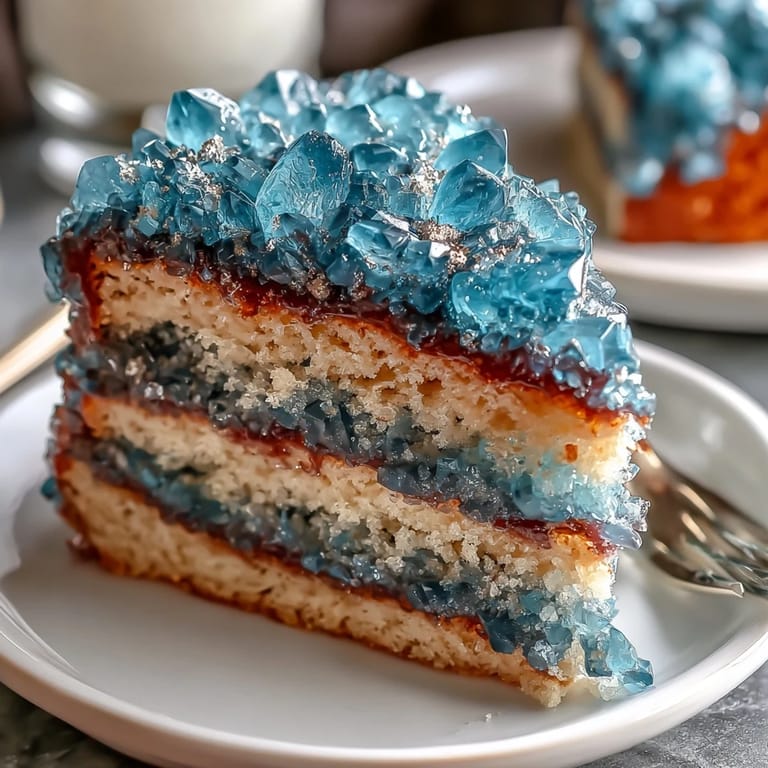
- → Can I use other colors for the geode?
Yes! Blend teal with blue gel coloring or try different shades to personalize the crystal design.
- → Is the cake suitable for vegetarians?
All ingredients are vegetarian, including the buttercream and edible decorations.
- → What cake flavor works best for this style?
Classic vanilla provides a light base, but lemon or almond extract can be added for extra aroma and flavor.
- → Is any special equipment required?
You'll need round cake pans, electric mixer, offset spatula, parchment paper, serrated knife, and paintbrush.
- → How do you achieve a moist cake?
Brushing layers with simple syrup keeps the cake tender and adds subtle sweetness.