 Save
Save My freezer used to be a graveyard of vegetable scraps until a neighbor casually mentioned she simmered hers into liquid gold. What began as an experiment in reducing waste became something I now crave on cold afternoons—a simple, fragrant broth that costs nothing but transforms every bowl of soup that follows. There's something almost meditative about turning what you'd normally discard into something nourishing.
Last winter I made this broth while my roommate was stress-cleaning the kitchen, and the steam rising from the pot made everything feel warmer and more hopeful. She stopped mid-sweep, breathed in deeply, and asked what smelled so comforting. When I explained I was basically simmering trash, she laughed so hard she had to sit down. By the time it finished, she was planning to start her own scrap container.
Ingredients
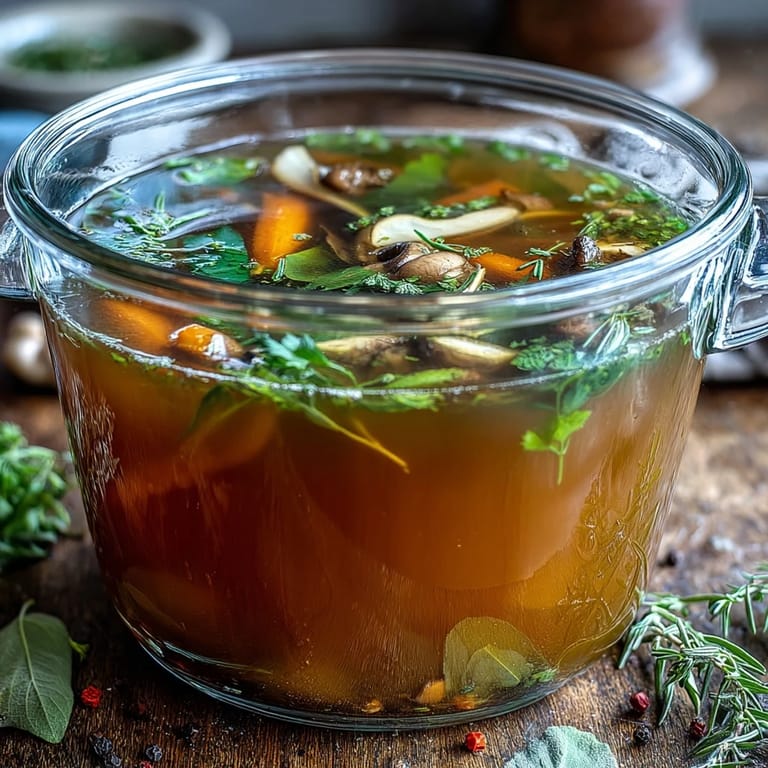
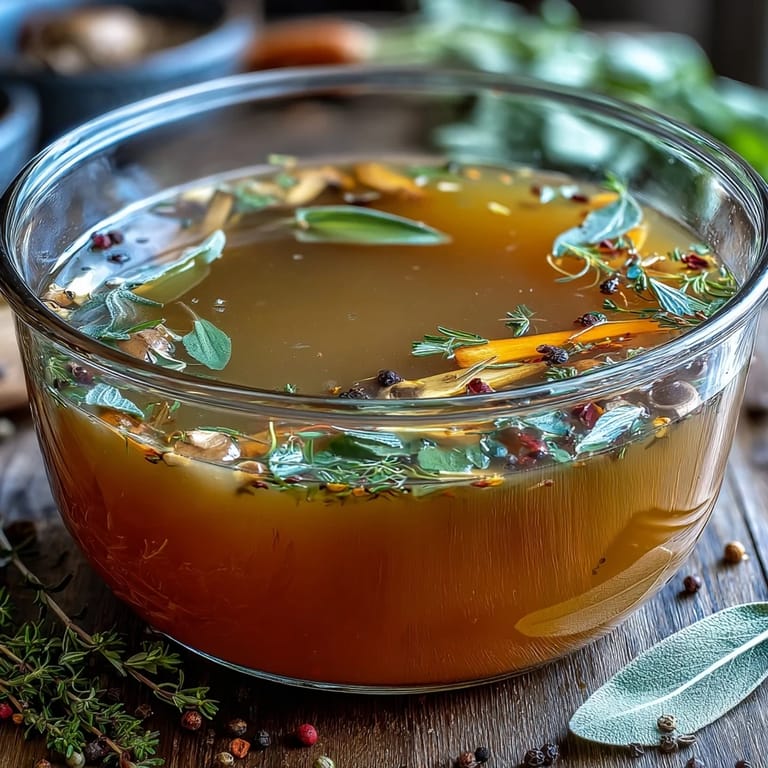
- Vegetable Scraps: Four cups of assorted trimmings like carrot peels, onion skins, celery ends, leek tops, and mushroom stems form the aromatic backbone; save these instead of discarding.
- Bay Leaf: One leaf adds subtle earthiness and depth without overpowering the delicate vegetable flavors.
- Black Peppercorns: Five to seven whole peppercorns bring gentle heat and complexity; crushing them slightly helps release their essential oils.
- Garlic: Two crushed cloves deepen the savory notes, though you can skip this if you prefer a lighter, more neutral base.
- Salt: One teaspoon is a starting point, but taste as you go since you may use this broth in already-seasoned dishes.
- Fresh Thyme or Dried: One sprig of fresh or half a teaspoon dried adds a whisper of herbal warmth that lingers beautifully.
- Cold Water: Eight cups ensures the scraps are fully submerged and allows even extraction of flavor over the hour-long simmer.
Tired of Takeout? 🥡
Get 10 meals you can make faster than delivery arrives. Seriously.
One email. No spam. Unsubscribe anytime.
Instructions
- Gather Your Kitchen Scraps Thoughtfully:
- Over several days, collect clean vegetable trimmings in a bowl or bag—carrot ends, onion papery skins, celery and leek greens, parsley stems, even mushroom bits. Avoid potato peels, brassicas like broccoli or cabbage, and anything that feels slimy or aged, as these can muddy your broth.
- Build Your Aromatics:
- Scatter your scraps into a large stockpot along with the bay leaf, peppercorns, garlic cloves, salt, and thyme. The beauty here is that every kitchen produces different scraps, so your broth will be slightly unique each time.
- Cover and Submerge:
- Pour eight cups of cold water over everything, making sure all the vegetable pieces are underwater. Cold water starts the extraction process gently and evenly.
- Bring to Life:
- Turn the heat to medium-high and bring the pot to a rolling boil; you'll see a bit of foam rise to the surface. Once boiling, immediately lower the heat to a gentle simmer where just a few lazy bubbles break the surface.
- Simmer and Skim:
- Let it bubble away gently, uncovered, for forty-five to sixty minutes. Every ten minutes or so, use a ladle to skim off any gray foam that rises; this is where impurities collect and removing it keeps your broth clear and refined.
- Taste and Adjust:
- After about fifty minutes, spoon out a small taste to check the depth of flavor and salt level. Remember you can always add more salt, but you cannot take it out.
- Strain with Care:
- Set a fine-mesh sieve or cheesecloth over a clean, large bowl or container, then slowly pour the broth through, letting it drain naturally without pressing down on the solids. This patience yields a clearer, more elegant broth.
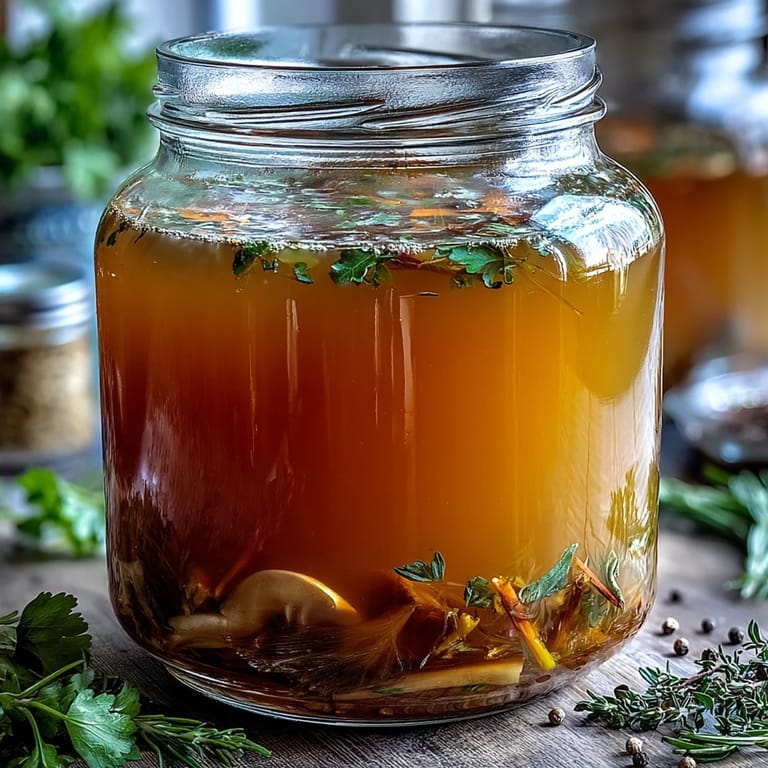
- Cool and Store:
- Let the broth cool to room temperature at the counter, then transfer to airtight containers. It keeps in the fridge for five days or freezes beautifully for three months.
 Save
Save One afternoon, I made this broth to use as the base for a simple vegetable soup for a friend recovering from being sick, and watching her face light up at something so humble felt unexpectedly moving. Food made from intentionality, even scraps, carries a different kind of warmth.
When Scraps Become Treasure
Keeping a dedicated container in your freezer for vegetable trimmings changes everything about how you move through the kitchen. Instead of feeling guilty about peeling carrots or trimming celery, you're gathering ingredients. This simple shift turns cooking from waste-heavy to resourceful, and after a month or two of collecting, you'll have enough for a generous pot of broth.
Flavor Variations Worth Exploring
Once you've made the basic version a few times, you'll start noticing how different vegetable combinations create different personalities in your broth. Lots of onion skins make it deeper and almost sweet; mushroom stems add an earthy richness; leek tops bring a gentle allium sweetness. If you want to deepen the flavor significantly, roast your scraps in a four-hundred-degree oven for twenty minutes before adding water—the caramelization brings a nearly golden quality to the finished broth that's stunning in risotto or poured over grains.
Making It Your Own
After the basic broth is straining, consider adding a small piece of kombu seaweed or a dried mushroom for umami depth, though the vegetable scraps alone create a perfectly delicate base. Some people add a small piece of ginger or a star anise pod toward the end of simmering if they want something more aromatic, though these are entirely optional flourishes. The beauty of this recipe is how it adapts to what you have and what you're hungry for.
- Start your scrap collection in a freezer bag so you never waste a single trim, and make broth whenever the mood strikes.
- Taste frequently during the simmering stage so you can catch it at exactly the flavor intensity you prefer—some prefer a lighter, subtler broth and others want deeper character.
- Label your frozen broth containers with the date so you can easily grab them within the three-month window when they're at their peak.
 Save
Save This broth reminds me that nourishment often hides in what we nearly throw away, and the best kitchen moments sometimes come from the simplest acts of intention. Make it once, and you'll find yourself starting a scrap container without even thinking about it.
Recipe FAQs
- → What vegetable scraps work best for making broth?
Use carrot peels, onion skins, celery ends, leek tops, mushroom stems, parsley stems, and garlic skins. Avoid potato peels, broccoli, cauliflower, and cabbage as they can add bitterness or cloudiness to your broth.
- → How long can I store homemade vegetable broth?
Store in airtight containers in the refrigerator for up to 5 days or freeze for up to 3 months. Allow the broth to cool completely before storing.
- → Can I make the broth more flavorful?
Yes! Roast the vegetable scraps at 200°C (400°F) for 20 minutes before simmering for deeper flavor. You can also add kombu or dried mushrooms for extra umami richness.
- → Should I add salt while cooking the broth?
Salt is optional during cooking. If you plan to use the broth in other dishes, it's better to keep it unsalted so you can control seasoning in your final preparation.
- → How do I prevent cloudy broth?
Maintain a gentle simmer rather than a rolling boil, skim off foam regularly during cooking, and avoid using starchy vegetables like potatoes. Strain through fine-mesh sieve or cheesecloth for clarity.
- → What can I use this vegetable broth for?
Use as a base for soups, stews, risottos, cooking grains like quinoa or rice, braising vegetables, or simply enjoy it warm as a nourishing, comforting drink.