 Save
Save The first time I made stuffed shells, I accidentally bought manicotti instead of jumbo shells and spent twenty minutes trying to stuff broken pasta tubes with a spoon. My kitchen looked like a ricotta explosion. Now I always double-check the pasta aisle, but that chaotic evening taught me that stuffed shells are worth every messy minute of preparation.
Last winter, my neighbor came over while these were baking and immediately asked what smelled so incredible. We ended up eating the entire dish standing at the counter, laughing about how comfort food has a way of bringing people together. Now whenever I make these, I think of that impromptu dinner party.
Ingredients
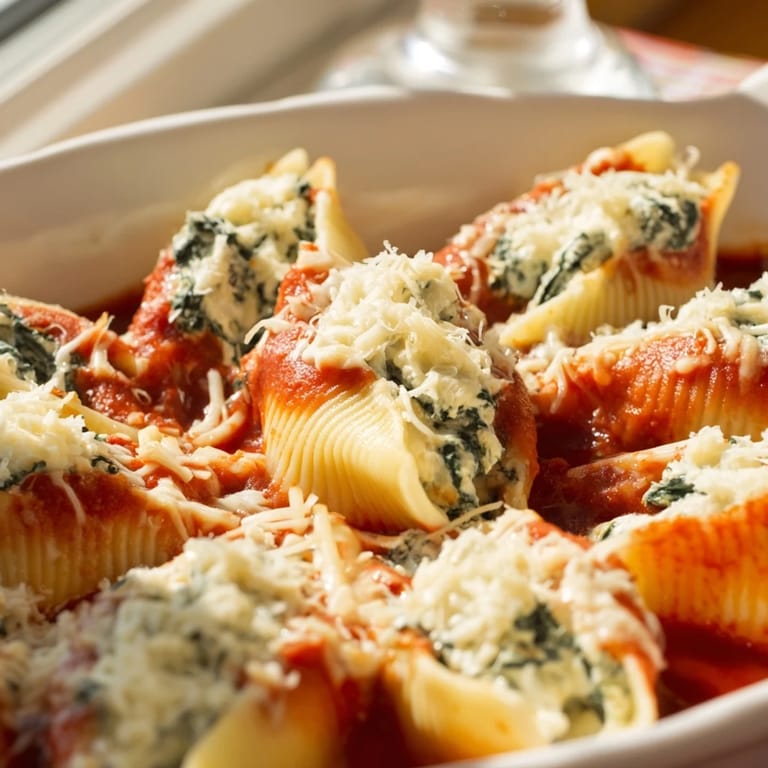
- Jumbo pasta shells: I learned the hard way that overcooking them during boiling makes them impossible to handle later
- Ricotta cheese: Whole milk ricotta makes the filling luxuriously rich, but part-skim works if you prefer
- Frozen spinach: Thawing and squeezing it until completely dry prevents watery filling, and I mean really squeeze it
- Parmesan cheese: Freshly grated melts better into the filling than the pre-grated kind
- Egg: This binds everything together so the filling doesnt separate during baking
- Nutmeg: Just a pinch adds a subtle warmth that makes the spinach taste brighter
- Tomato passata: Using smooth tomatoes instead of chunky ones coats the shells evenly
- Mozzarella cheese: Low-moisture shredded cheese creates that beautiful golden blanket without too much oil
Tired of Takeout? 🥡
Get 10 meals you can make faster than delivery arrives. Seriously.
One email. No spam. Unsubscribe anytime.
Instructions
- Preheat your oven to 180°C 350°F:
- Getting the oven ready first means no waiting when your sauce is perfectly simmered
- Boil the pasta shells:
- Cook them two minutes less than the package directs since they will finish cooking in the oven
- Mix the ricotta filling:
- Combine everything until it looks like a unified green-speckled cloud, stopping to taste for salt
- Simmer the tomato sauce:
- Let those onions soften completely, and do not rush the fifteen minute simmer, it builds depth
- Layer sauce in the baking dish:
- That first layer of sauce prevents shells from sticking and creates a flavorful foundation
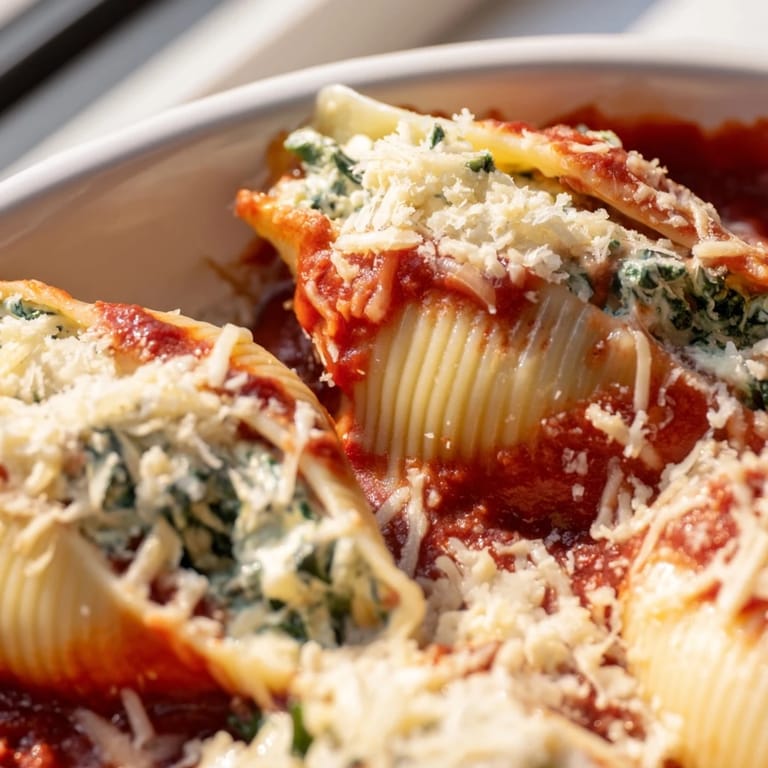
- Stuff each shell generously:
- A small spoon or piping bag works, and do not worry about being too neat, they will look beautiful baked
- Arrange shells in rows:
- Cram them in snugly so they support each other while baking
- Spoon remaining sauce over top:
- Make sure every shell gets some love, even the corners
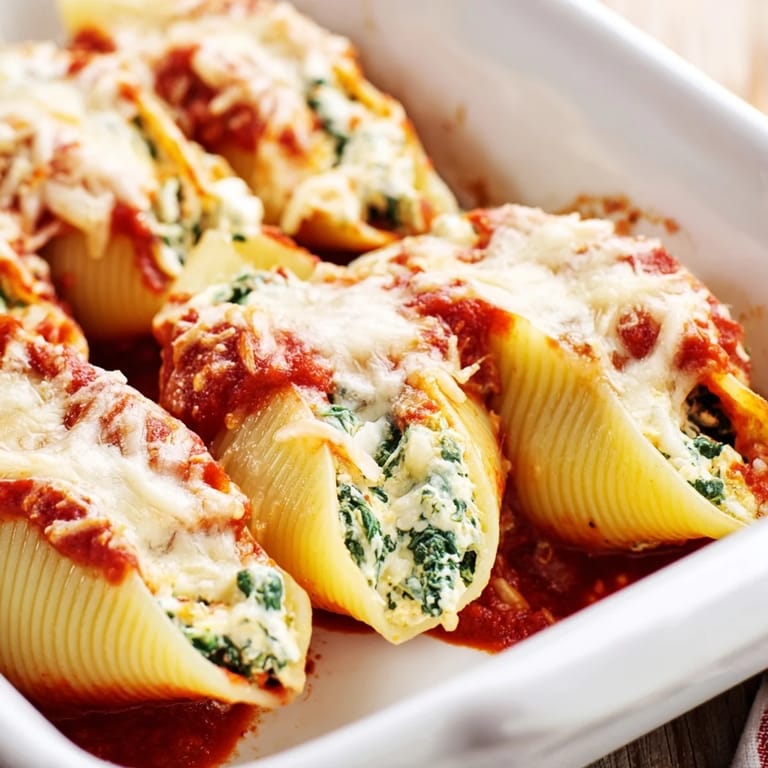
- Layer both cheeses:
- Sprinkle them evenly so every bite gets that golden cheesy crust
- Bake covered then uncovered:
- The foil steams the shells tender, and those final minutes without it create the bubbly top we all want
- Let it rest briefly:
- Five minutes seems like forever when it smells this good, but it helps the filling set
 Save
Save My sister used to request these for every birthday dinner, and now that she lives across the country, making them feels like having her here. Food really does carry memories across distances.
Making Ahead
I have discovered you can assemble the entire dish up to 24 hours before baking, just cover it tightly and refrigerate. You may need to add five extra minutes to the baking time if it goes into the oven cold from the fridge.
Freezing Instructions
These freeze remarkably well either before or after baking. Just wrap the dish tightly and freeze for up to three months. Thaw overnight in the refrigerator before baking as directed.
Serving Suggestions
A crisp green salad with vinaigrette cuts through the richness beautifully. Garlic bread is non-negotiable in my house.
- Grind extra fresh pepper over each portion at the table
- Keep some extra warm sauce handy in case anyone wants more
- A light red wine pairs perfectly if you are enjoying this with adults
 Save
Save There is something deeply satisfying about pulling a bubbling dish of stuffed shells from the oven, especially when you know the real magic happens at the table.
Recipe FAQs
- → Can I make stuffed shells ahead of time?
Yes, assemble the stuffed shells completely and refrigerate for up to 24 hours before baking. You may need to add 5-10 minutes to the baking time if baking from cold. Alternatively, freeze the assembled dish unbaked for up to 3 months.
- → How do I prevent the shells from sticking together after boiling?
After draining the cooked shells, arrange them in a single layer on a baking sheet or tray. Ensure they're not touching each other. You can lightly toss them with a small amount of olive oil to prevent sticking further.
- → Can I use fresh spinach instead of frozen?
Absolutely. Use about 300g fresh spinach, wilt it in a pan with a little olive oil, then squeeze out all excess moisture before chopping and adding to the ricotta mixture. Removing excess liquid is crucial to prevent soggy filling.
- → What can I serve with stuffed shells?
A crisp green salad with balsamic vinaigrette complements the rich, cheesy pasta beautifully. Garlic bread or focaccia is perfect for soaking up the extra sauce. Roasted vegetables like zucchini or bell peppers also make excellent sides.
- → How do I know when the stuffed shells are done baking?
The stuffed shells are ready when the cheese topping is bubbling and golden brown, typically after 35-40 minutes of baking. The sauce should be bubbling around the edges of the dish, and the shells should be heated through completely.
- → Can I make this dish gluten-free?
Yes, simply use gluten-free jumbo pasta shells instead of regular wheat pasta. Ensure all other ingredients, including cheeses and seasonings, are certified gluten-free. The cooking time for gluten-free shells may vary slightly, so check package instructions.